Creating an audit trail
An audit trail provides you with information about the transactions executed in Enterprise Manager. Enterprise Manager traces operations that require a minimum role of operator. For these operations, the audit trail shows who did what, when, and on which objects. By default, the audit trail is enabled. Audit trail files are located in the following folder: <Enterprise Manager installation folder>\data\AuditTrail\audit_service.
The audit trail is secure. Audit files are compressed and protected by checksum.
Do not edit or delete the audit files. Any changes to these files might cause the system to crash.
Enterprise Manager retains audit files for two weeks or until they reach a total size of 100 MB (10 files). You can configure these settings through the command line interface (CLI). For more information, see Configuring Enterprise Manager using the CLI, in particular the aemctl.exe audit_trail control command.
In addition, you can manually download an audit trail file in .csv format. This file includes filtered actions for a specific time frame or a custom time range.
Audit trail files may contain all or some of the following information, depending on whether the object exists in Enterprise Manager:
- Timestamp (UTC)
- User
- Node
- Requested Action
- Required Permission
- Effective Permission
- Security Result
- Action Result
- Error Message
- Server
- Task
- Endpoint
- Notification
- Enable
- Delete_task_logs
- Tag
- Schema
- Table
- Delete_fts_logs
- FTS (File Transfer Service)
-
Payload
To view payload information, you can copy the link in the Payload column and paste it into the address bar of a browser window.
For information on decoding stream payloads, see Decoding an encoded stream payload.
Information noteThe REST information listed in the following table is not presented in the audit trail columns. It is only accessible via the payload.
REST access points REST Info Access From puterrorbehavior payload - task name tablecontrol payload - task name test_database_async payload - endpoint name browse_connection_async payload - endpoint name action=test_async_complete payload - endpoint name action=browse_connection_async payload - endpoint name
To manually download an audit trail file:
- Click the Audit Trail icon
 in the top right corner.
 -
In the Audit Trail dialog box, from the Time Range list, select a time range.
-
If you select Custom, also specify the From date and time and the To date and time.
The time you select is the local machine time. This gets converted to coordinated universal time (UTC) in the resulting CSV file.
-
Click Generate.
The AuditTrail.csv file is created and downloaded. Depending on your browser, you should see it at the bottom of your browser window or in a separate window.
Decoding an encoded stream payload
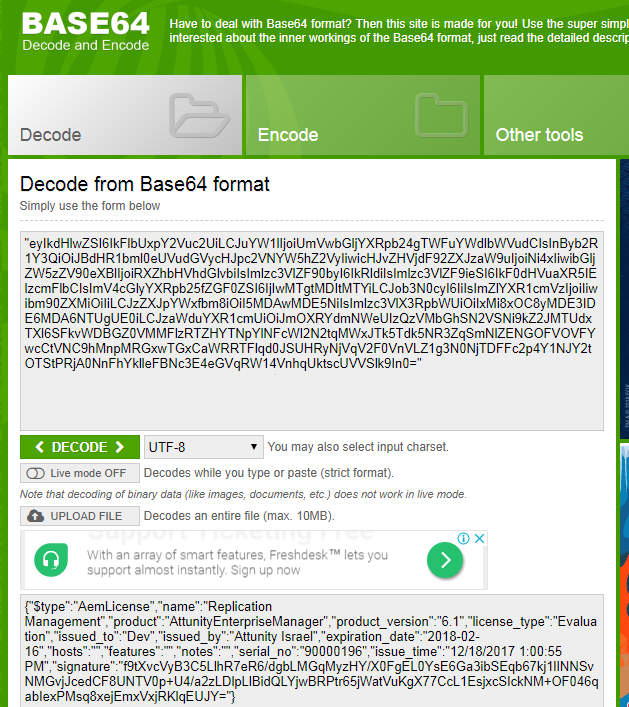
Some audit records (e.g. RegisterLicenses) may contain an encoded stream payload. Encoded payloads are displayed as byte arrays and need to be decoded using Base64.
To decode an encoded stream payload:
-
Locate the payload URL in the audit record.

-
Copy the URL into your browser's address bar and press [Enter].
A byte array will be displayed.

-
Copy the byte array into a Base64 decoder and decode it.

