Early Access: The content on this website is provided for informational purposes only in connection with pre-General Availability Qlik Products.
All content is subject to change and is provided without warranty.
Skip to main content Skip to complementary content

Browsing datasets from the Catalog

From the left menu of the Qlik Talend Data Integration homepage, you can access the Catalog page. This is your tool to explore all the assets you have access to in your avialable spaces:

  • Datasets

  • Data products

  • Analytics apps

Overview of the Catalog page in Qlik Talend Data Integration

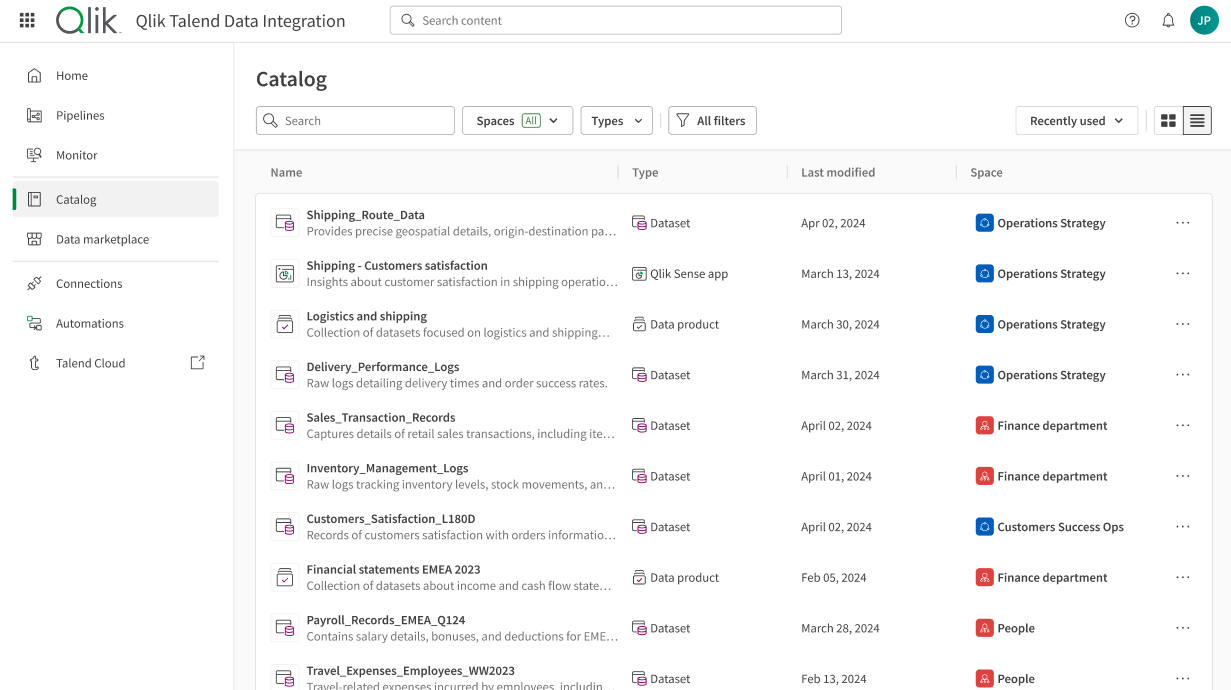
Using filters, you will be able to browse and look for trusted datasets to use in data products. Datasets can be the result of a manual upload, or created from a project when using the Publish to catalog option. See Project settings for more information.

Connection settings for data quality and app consumption

Before looking at a specific dataset, you need to set up an important prerequisite with your connections in the context of data products.

In order for you to create dataset from a specific data source, and later have access to their schema and quality in the dataset overview and data product overview, you need to set up the same connection in both the Qlik Talend Data Integration hub, and Qlik Analytics Services hub.

Example for a Snowflake connection

Let's say you want to bring data stored in a Snowflake database, add it to your Catalog as datasets, and group them in a data product that you will use for an analytics app.

  1. In Qlik Talend Data Integration, click Add new and then Data connection.

  2. Configure your access to the Snowflake database using the credentials of a user that has WRITE permissions and access to the tables you want to import.

  3. In Qlik Analytics Services, click Add new, and then Data connection.

  4. Configure your access to the same Snowflake database as previously, using the credentials of the same user ideally, or one that has at least the READ permissions on the tables.

  5. In the Role field, you must enter a role that corresponds to an existing role created in the Snowflake database, and that has the following privileges on these objects.

    • USAGE on WAREHOUSE

    • USAGE on DATABASE

    • USAGE on SCHEMA

    • CREATE TABLE on SCHEMA

    • CREATE FUNCTION on SCHEMA

    • CREATE VIEW on SCHEMA

    • SELECT on TABLE

  6. Back on the Qlik Talend Data Integration homepage, click Add new and then Create project.

  7. Use your Snowflake connection from step 2 as source for your project and start building your pipeline. See Creating a data pipeline for more information.

  8. At any point in your pipeline, select a data task, go to Settings, and then the Catalog tab where you can select the Publish to Catalog check-box.

    It means that this version of the dataset will be published to the Catalog when the project is prepared and run. It's also possible to check this option at the project level.

  9. Run your project.

After running your project, the new dataset is added to the Catalog and you will be able to access quality indicators and more details about their content. This configuration also makes it possible to use the Snowflake datasets as source for analytics apps.

You can add as many datasets as necessary before building your data product. Since the Catalog can be accessed from both the Qlik Talend Data Integration hub, and Qlik Analytics Services hub, you can open your datasets in your preferred location, and the right connection will be used depending on the context.

Looking at the dataset information

When opening a dataset from your Catalog, you can access many details, benefit from several data quality indicators and look into the data itself. This information is organized in 5 different tabs.

Overview

In this tab, you can get general details about your dataset such as the connection it is based on, its description, when the data was last refreshed, and more importantly, data quality indicators:

  • Data quality, showing the repartition of valid, invalid, and empty values across the dataset in the form of a quality bar with three colors.

  • Validity, expressing the percentage of valid values, without taking empty values into account.

  • Completeness, expressing the percentage of values that are not empty.

In the Schema area of the overview, you can see the different fields of the dataset, their data types, and a quality bar for each field.

If the schema and quality are not displayed at first, use the Compute button or the Refresh icon.

Overview tab of a dataset

Tip noteIf the schema and quality of the dataset fails to be retrieved, check if the connection you have set up in the Qlik Analytics Services hub has the Role field properly filled, or if the role itself grants the necessary permissions on the database table.

Profile

This tab contains graphical representations of your data. The type of visualization or histogram depends on the data type, and you can get statistics and information on the repartition of values for each field of your dataset. SeeManaging field-level metadata and data profiling for more information.

Profile tab of a dataset

Data preview

You can take a look at the data itself in the form of a sample. For each column, you can see the data type, and the number of valid and invalid values is visible in a quality bar. Invalid values are also highlighted across the dataset.

Data preview tab of a dataset

Lineage

This tab offers a visual representation of the origin of the data contained in the dataset, such as the source table, and the data pipeline used to import it. See Analyzing lineage for apps, scripts, and datasets for more information.
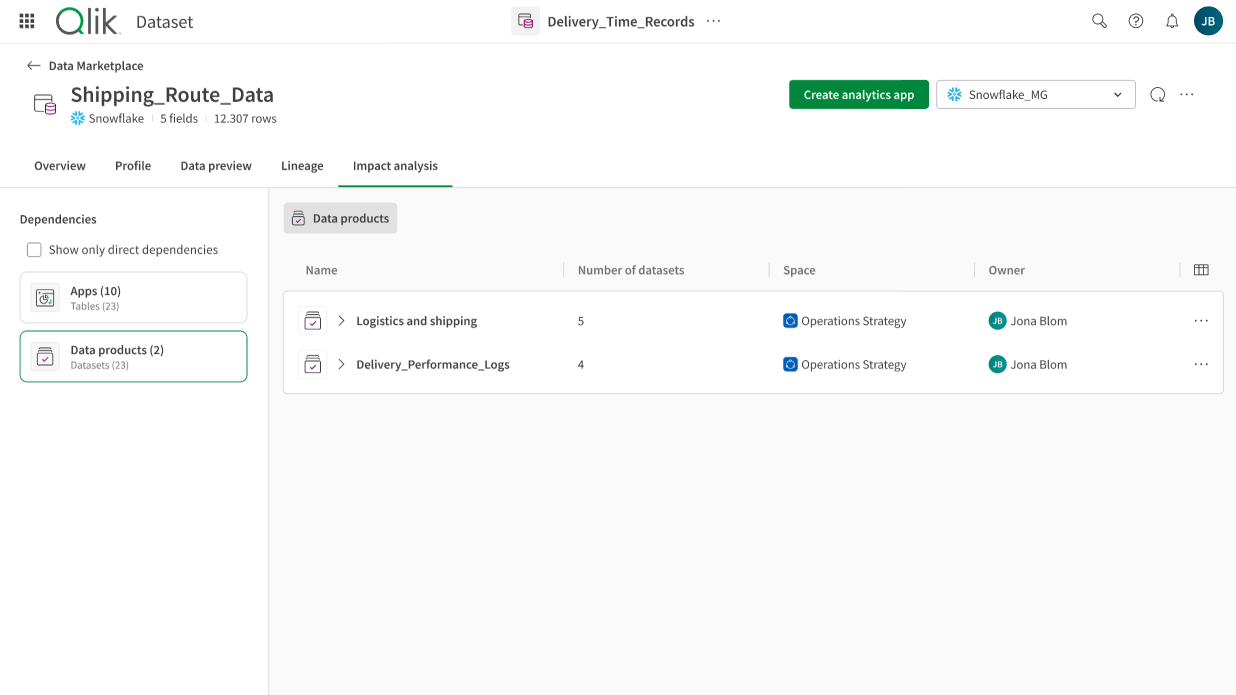
Lineage tab of a dataset

Impact analysis

The impact analysis of a dataset allows you to see the apps or data products that use this dataset and that will be impacted if you edit or delete it. See Analyzing impact analysis for apps, scripts, and datasets fore more information.

Impact analysis tab of a dataset

Did this page help you?

If you find any issues with this page or its content – a typo, a missing step, or a technical error – let us know how we can improve!