
Setting up selected REST sources for data loading
You use the developer interface for each platform to get credentials and query parameters for the specific application or service you intend to collect data from.
Connecting to Facebook
Do the following:
-
Sign into your Facebook account at:
-
Create a new application.
The registration and validation process for the application takes time, so the application may not be available as soon as you add it. If you have an application that was written previously, you can access that immediately, but it must be an application created with a developer account.
-
Navigate to the developer explorer page at:
- Select the application.
-
Select Get Access Token.
The objective is to provide access to data. Get Access Token is currently the interface label Facebook uses. Even if that label changes, there must be a means of getting an access token.
-
Generate an API method.
-
Submit.
-
Go to the connection dialog in the REST Connector.
-
In the URL field, enter the URL from your Facebook application.
The URL contains the API method that determines the type of response the data source returns. For example:
https://graph.facebook.com/+'me?fields=albums.limit(5),posts.limit(5)'
-
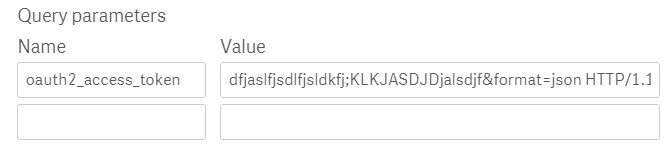
Add a parameter in the Query parameters field for the access token you received for the application.
For example:

The access token authenticates your access to the Facebook data. You do not need Windows authentication nor do you need to provide your Facebook credentials in the User name and Password fields.
-
Complete the remaining fields and selections in the connection dialog.
Connecting to LinkedIn
Do the following:
-
Sign into your LinkedIn account at:
-
Navigate to the developer page at:
-
Create a new application.
The registration and validation process for the application takes time, so the application may not be available as soon as you add it. If you have an application that was written previously, you can access that immediately.
- Follow the LinkedIn instructions for setting up OAuth 2.0 authentication and acquiring an access code: Authenticating with OAuth 2.0 Overview
-
Go to the connection dialog in the REST Connector.
-
In the URL field, enter the URL generated for your LinkedIn application.
-
Enter your LinkedIn credentials in the User name and Password fields.
-
Add a parameter in the Query parameters field for the access token you received for the application.
For example:
-
Complete the remaining fields and selections in the connection dialog.