Installing Qlik Lineage Connectors
Qlik Lineage Connectors are installed locally and accessed as a service on your web browser.
Qlik Lineage Connectors requirements
Qlik Lineage Connectors can coexist with your BI tools on the same server. What Qlik Lineage Connectors need in terms of a memory footprint is linear to the number of objects and files in the environment you intend to cover. Since Qlik Lineage Connectors only use metadata surrounding your solution, they generally consume significantly less resources than the systems they connect to.
| Platforms |
Windows 10 or Windows Server (with .NET 4.7.2 or higher) |
|---|---|
| Processors (CPUs) |
dual-core 1.6 GHz |
| Memory (RAM) |
2 GB Memory requirements are directly related to the amount of data being analyzed. |
| Disk space |
2 GB Qlik Lineage Connectors have light storage requirements; parsed application logs and graph result sets are saved to disk then streamed to Qlik Cloud. |
| PowerShell | 5.1 is installed by default on Windows 10 with automatic updates enabled. |
| TLS |
1.2 or higher By default, Qlik Lineage Connectors use TLS1.2 on port 4114. If NTLM authentication is used, 4115 is also used. When communicating with external systems, Qlik Lineage Connectors default to TLS 1.2, but will downgrade to TLS 1.0/1.1 if required by the server. |
| System cryptography |
Qlik Cloud Government supports using Qlik Lineage Connectors only when Windows is configured to run in a FIPS 140-2 approved mode of operation (FIPS mode). To turn on FIPS mode, enable the Windows policy: System cryptography: Use FIPS compliant algorithms for encryption, hashing, and signing. For more information, see step 3 of the procedure Using Windows in a FIPS 140-2 approved mode of operation. Information noteNo additional modules need to be installed (step 1 and 2). Qlik Lineage Connectors use only the modules already provided by Windows and included in the list of validated modules. Qlik Lineage Connectors enforce the use of only FIPS-validated cryptographic algorithms through .NET Runtime (step 4).
|
Qlik Lineage Connectors installer
Installation of Qlik Lineage Connectors is done by running the installer. To download the installation package, click your user profile menu, select Settings, and go to Tools. Locate the Qlik Lineage Connector and click Download. By default, it will be installed into your C:/ drive Program Files folder and data and logs will be stored under the common ProgramData folder.
Do the following:
-
Save the installation package locally and run setup.exe to start the installation.
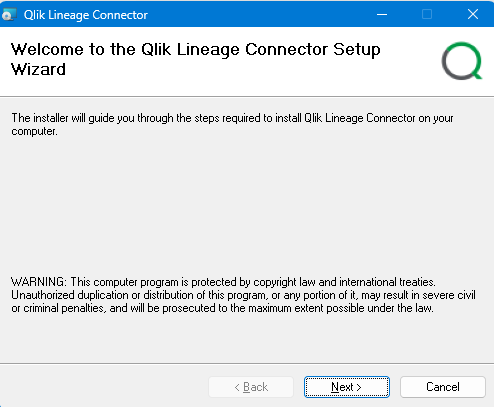
- Select Next to continue.
-
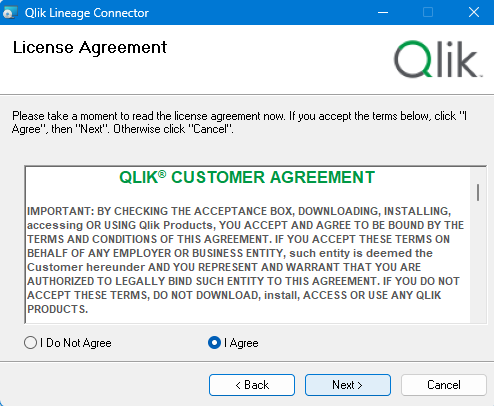
Review the license agreement for the Qlik Lineage Connectors software package; select I Agree and Next to continue the installation.
-
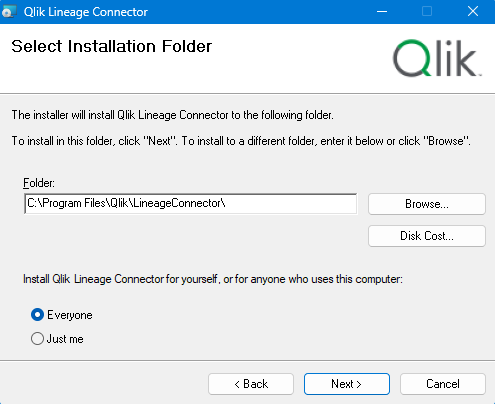
Keep the default install folder (C:\ProgramFiles\Qlik\LineageConnector\) or select a different location and select Next.
-
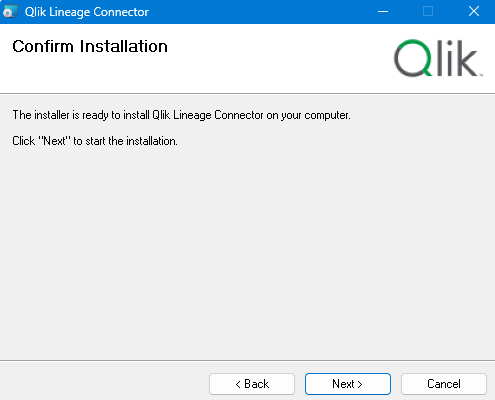
Select Next to begin the installation of Qlik Lineage Connectors.
Confirm installation of Qlik Lineage Connectors.
-
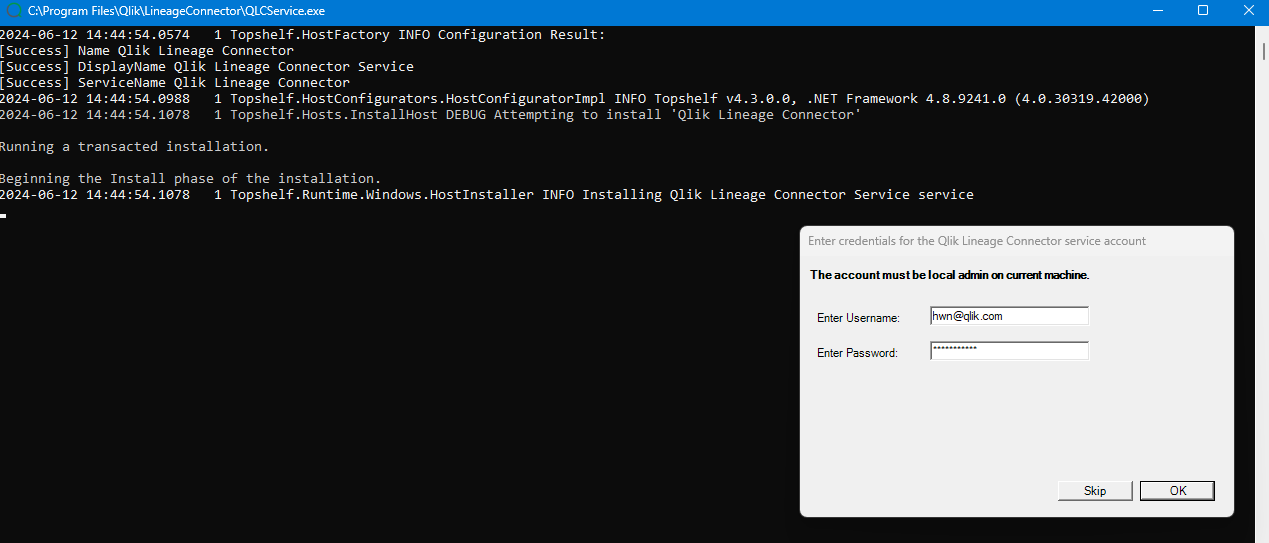
A console output window registers installation processes. Enter service account Username and Password credentials to run the Qlik Lineage Connectors in the dialog window. Passwords require at least 7 alpha-numeric characters and at least one special character (example, ! @ # ?).
These are the server account credentials for the service account that will be running Qlik Lineage Connectors. Select Ok.
Information noteThe service account is used to access files and logs used in the BI solution. For example, this service account in QlikView or QlikSense must have the same or higher access rights as the service account running the QlikView Publisher service or the Qlik Sense services. It is recommended to use the same service account credentials as the credentials that are running Qlik services. During the reload of Qlik Lineage Connectors these files will be accessed to retrieve metadata or to extract lineage information. A sufficiently high level of access is needed in order to retrieve this information.
-
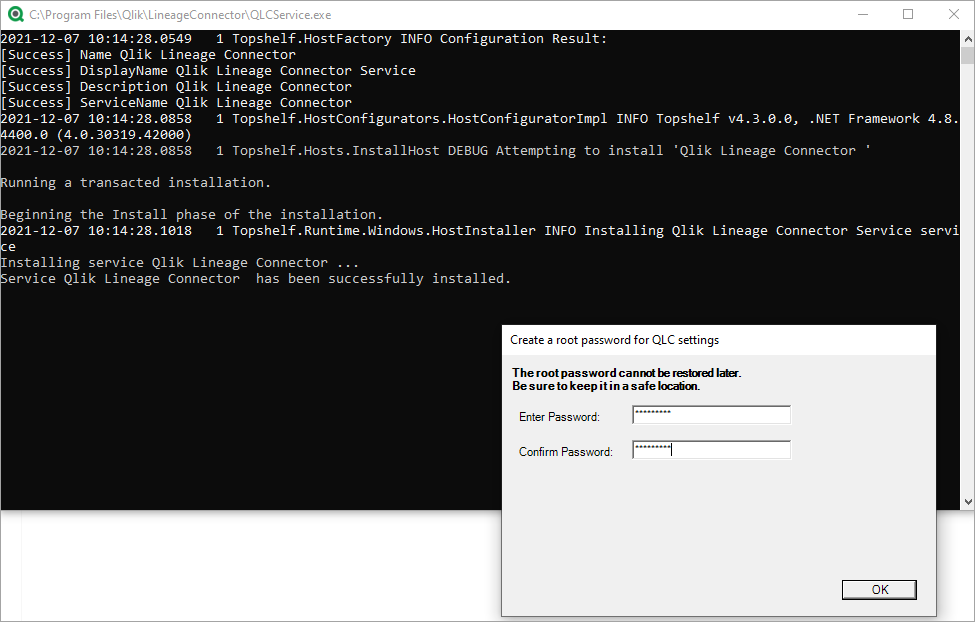
Create a root password for Qlik Lineage Connectors settings.
-
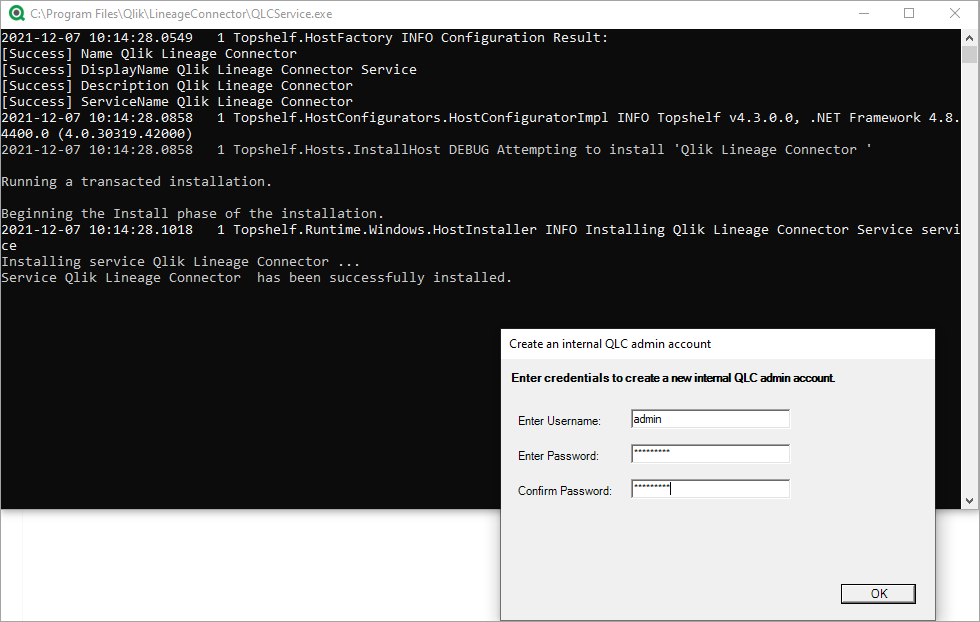
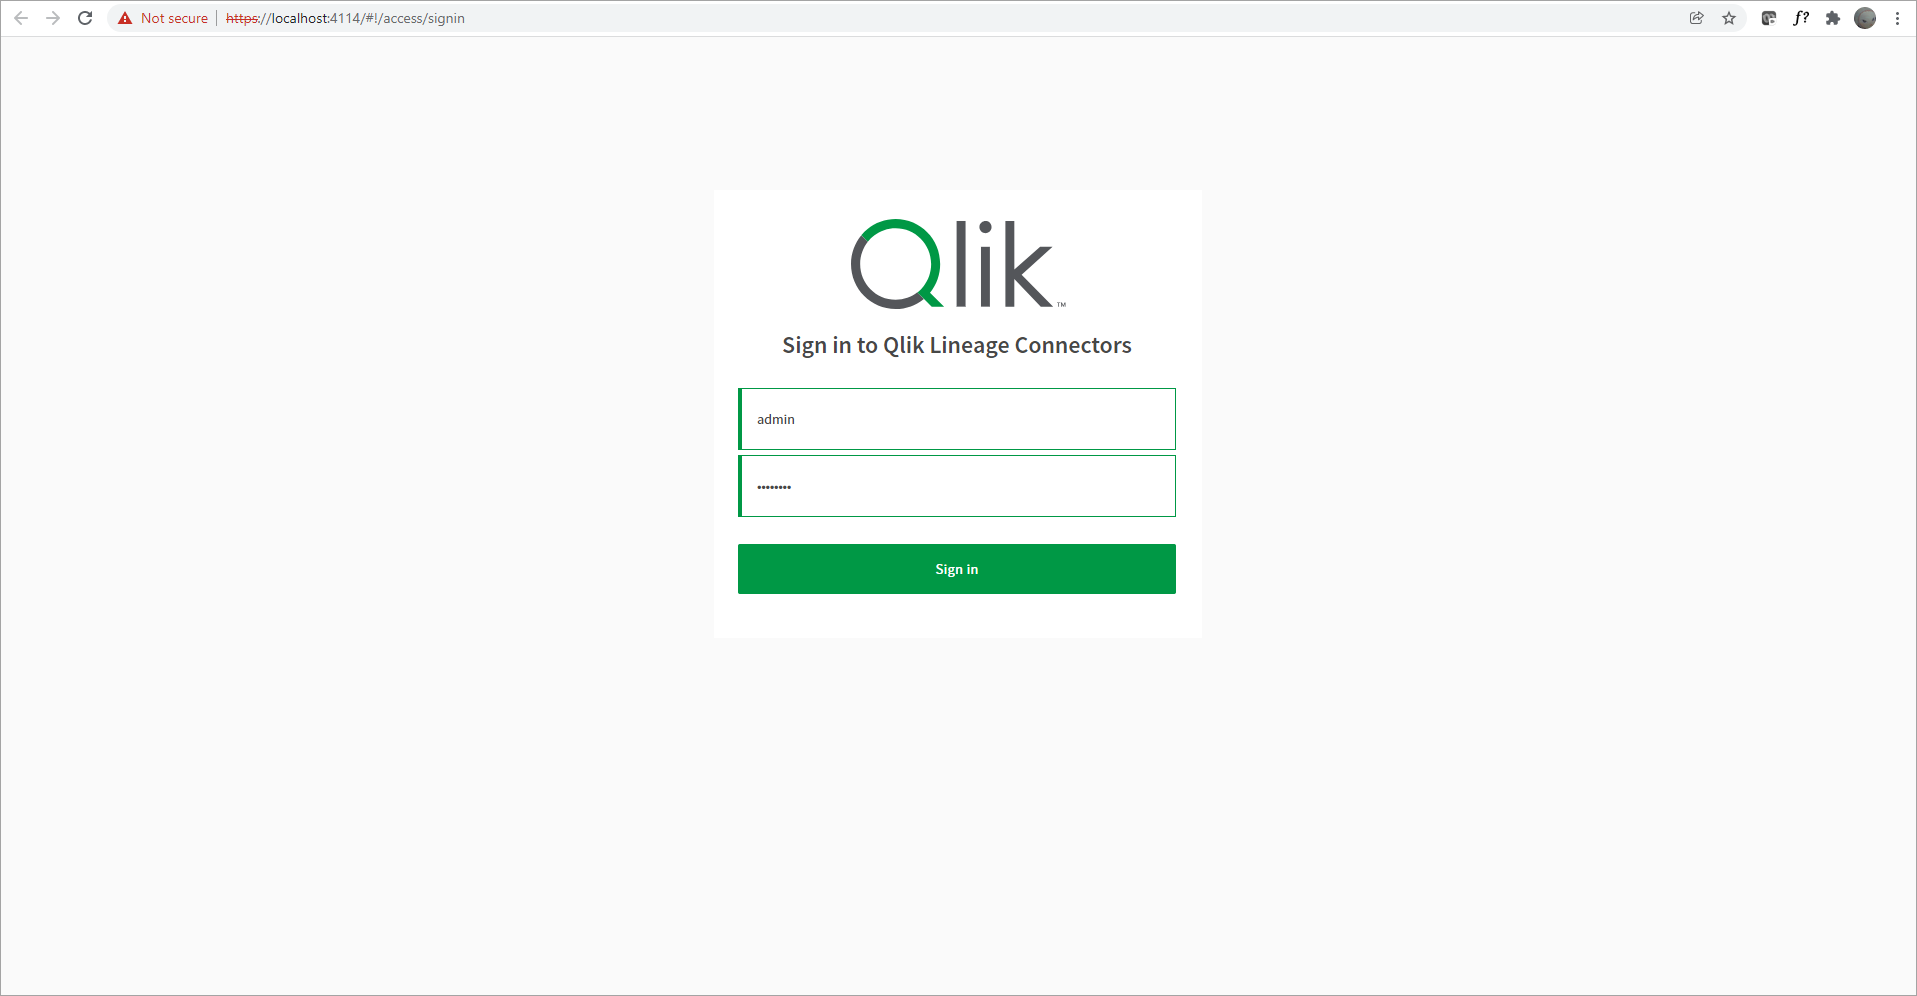
Create an internal Qlik Lineage Connectors admin account and select Ok. These credentials will be used to access Qlik Lineage Connectors at the login screen. (See Sign in with the admin credentials you created upon installation)
-
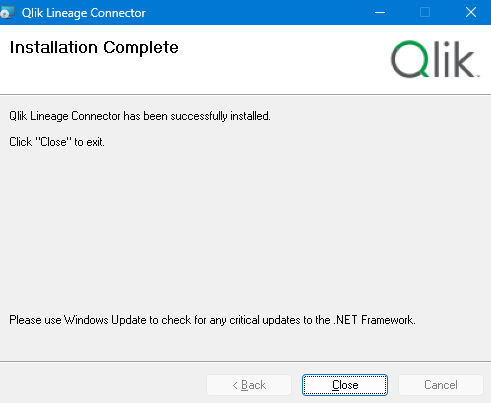
Select Close when the installation is complete.
Accessing and running Qlik Lineage Connectors
Installing Qlik Lineage Connectors extracts the program files into the installation root directory and creates the service called Qlik Lineage Connector Service. The service runs with the default account Local System. You can find this under Services in Windows. The Qlik Lineage Connectors service is now installed and runs with the default account Local System.
Qlik Lineage Connectors can now be accessed by:
-
Using a web browser and the URL: https://localhost:4114 or http://<servername>:4114
-
Using the Windows program shortcut on the installed machine: Qlik Lineage Connector
You should now be presented with the Sign In page for Qlik Lineage Connectors, indicating a successful installation.
Do the following:
Communication and port settings
Qlik Lineage Connectors run as a web service on the installed machine. Port 4114 is the default port but the port can be changed in a config file. Users must be able to access this port from their machines. For more information, see Editing server configuration
For outbound communication, Qlik Lineage Connectors need to be able to communicate with the different ports that each separate system uses. Refer to documentation provided by the BI tools and source systems. Service Message Block (SMB) also needs to be enabled to access any folders using shared Universal Naming Convention (UNC) paths.
Inbound communications depend on whether Qlik Lineage Connectors should be accessed from users outside of the server or not. The default port is 4114, and if you plan to use Windows NT LAN Manager (NTLM) authentication, a separate endpoint is running behind the scenes on port 4115 as default.
The ports can be modified to any ports preferred. If the server is dedicated to Qlik Lineage Connectors, then 80/8080 or 443/4443 can be used instead.
If you are using email notifications, access to a Simple Mail Transfer Protocol (SMTP) server is required. If you are using Slack hooks, Qlik Lineage Connectors need to be able to communicate with slack.com over the internet.
Editing server configuration
Qlik Lineage Connectors default ports and settings can be configured by editing the configuration file.
The service configuration file is a JSON structure. The default placement for the service configuration file is in the install root directory: C:\ProgramData\Qlik\LineageConnector\ svc.configThe following is an example service configuration with default values:
- Prior to any editing, be sure the service is stopped.
The configuration file is an XML file and provides a pointer to the directory and password for the services file. The following is an example configuration:
<configuration>
...
<appSettings>
	<DataDirectory value="" />
	<DbPassword value="" />
<appSettings>
<configuration>
{
"Host": "*",
"Port": 4114,
"UseTLS": true,
"AuditLog": false,
"AuditLogLevel": "Full",
"Authentication": "Internal",
"HeaderUser": "x-nod-user",
"HeaderGroup": "x-nod-group",
"HeaderResolveADGroups": true,
"NtlmUrl": "https://localhost:4115/ntlm/token",
"NtlmPort": 4115,
"DisableScheduler": false
}
Qlik Lineage Connectors service configuration
Communication with Qlik Cloud might be hindered by local network settings. If your network uses proxies or other local limitations, editing the Qlik Lineage Connectors service configuration might be need to properly communicate with the Qlik Cloud tenant.
The configuration file is an XML file and its default location is C:\Program Files\Qlik\LineageConnector\QLCService.exe.config.
This is the default configuration:
To use the default network configuration as instructed by the Global Policy/Windows policy, uncomment the <system.net> proxy settings. If you still have communication issues after making these changes, contact your network administrator for proxy configurations and other network-specific limitations.
Additional system access for Qlik Lineage Connectors
Additional configuration steps may be required to ensure access to BI tools and data source environments to extract all available metadata.
QlikView
No extra access is required.
Qlik Sense
An exported trust certificate from the Qlik Management Console (QMC) will be required by Qlik Lineage Connectors for API calls to be allowed. The service account also needs to be RootAdmin to ensure full rights during API calls. For this reason, it is best to run Qlik Lineage Connectors with the same service account as Qlik services use by adding it to the local admin group on the server.
Qlik NPrinting
Access to Qlik NPrinting is configured by a connection string to Qlik NPrinting's underlying PostgreSQL database. In addition to the account credentials, Qlik Lineage Connectors' system DNS/IP must be placed on Qlik NPrinting's host configuration allowlist. For production, a separate Postgres user should be set up for Qlik Lineage Connectors use.
Open POSTGRES for External Connections
If Qlik Lineage Connectors and Qlik NPrinting servers are installed on different machines, the Qlik NPrinting PostgreSQL instance needs to be configured to accept external connections.
The configuration files are located on the Qlik NPrinting server under: %ProgramData%\NPrinting\data\
In the file postgresql.conf: file uncomment or add listen_address with an * asterisk value:
Listen_address on postgresql.conf

In the pg_hba.conf file, add a host entry to add the Qlik Lineage Connectors server IP to the allowlist:
Allowlisting Qlik Lineage Connectors server IP

Tableau
During the connector setup, a Tableau user is specified, either by using the credentials directly or by specifying a Personal Access Token. The Tableau user specified needs to be Site Administrator or have similar rights for content extraction.
Snowflake
The Snowflake account needs to be AccountAdmin for the databases intended to be read by Qlik Lineage Connectors. Authentication on the Snowflake account is configured by user/password in the connector configuration fields.
MS SQL
The account used to connect to the MS SQL server needs to be sysadmin. During the connector setup in Qlik Lineage Connectors, a connection string needs to be entered. This makes it possible for the Qlik Lineage Connectors admin to decide whether internal authentication with the Qlik Lineage Connectors service account should be used, or if a specific database user should be specified.
Oracle
The account used to connect to the Oracle server does not have to have the role of sysadmin but the detectable database objects are limited by the user permissions. When configuring an Oracle connector, a connection string is entered. At this time it is possible for the admin to decide whether internal authentication with the service account should be used, or whether a specific database user should be specified.
Upgrading Qlik Lineage Connectors
Qlik Lineage Connectors can be upgraded on the Windows machine it is installed on.
Do the following:
-
Open and sign into Qlik Lineage Connectors with your Admin credentials.
- Select the
icon to open About Qlik Lineage Connectors. A notification on the information icon will indicate that a newer version is available. A box opens with Current version information. If you are not on the most current version, an option to Download latest version: x.x.x displays. Select the link to download the latest version.
-
Select the Windows key, Windows + S shortcut, or click in the search box on the taskbar, find “add or remove programs”.
- Select Qlik Lineage Connectors in the list of installed apps and select Uninstall.
- Select the downloaded QlikLineageConnectorSetup.msi file and follow the setup screens entering Service credentials Admin password when prompted. The upgrade installs automatically and configured projects and connectors are preserved.
Uninstalling Qlik Lineage Connectors
Qlik Lineage Connectors can be uninstalled on the Windows machine through the Add or Remove Programs utility.
Do the following:
-
Select the Windows key, Windows + S shortcut, or click in the search box on the taskbar, enter “add or remove programs” or “apps & features”, and add or remove programs.
- Select Qlik Lineage Connectors in the list of installed apps and select Uninstall.
